Before the installation
- Check the engine grease system
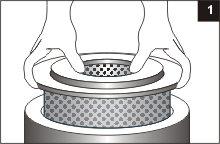
- Use only kligielit or asbestos gaskets, do not use sealant or silicone (otherwise you may loose your warranty)
- change the oil and the oil filter
- control the air filter and the wires of the suction collector
Most complaints we get are not due to faults in our turbochargers but due to faulty use or failure to follow the installation steps. The below comments and the instruction manual that will broaden your knowledge of superchargers.
First of all, one needs to realise that superchargers are both extremely precise and delicate. Follow the basic use rules and you will avoid any potential damages.
The proper installation of the supercharger
The turbocharger and its proper installation in the turbo system.
Before you install the charger localise the cause of the damage to avoid damaging the charger after the installation.
1. The air gear has to be clean. It is necessary to change the air filter, otherwise foreign bodies might damage the supercharger’s scoop – please use the recommended parts (OEM parts).
2. Check the oil gear in the engine (tightness and permeability), the supercharger needs to have a constant oil supply. Please check all the gaskets of the charger’s grease system. Just like the air gear, the oil gear also needs to be clean.
3. Every time you exchange the charger, you need to also exchange the oil and the oil filter. Use only the manufacturer recommended oils and filters.
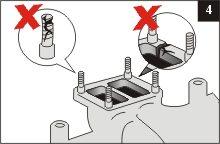
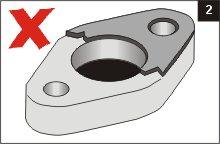
4. During the installation pay special attention to the gaskets.
The gasket under the collector needs to be heat-resistant. The screws need to be tightened up with a torque wrench so that the size of the torque is properly adjusted. Control the cleanliness of the collector.
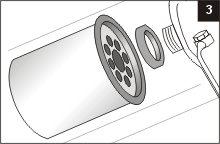
We are one of the few who used red plugs in the outlet and the feed of oil. The red plugs need to be removed!
Additionally we are providing you with a free of charge oil outlet gasket. It is a tested and original gasket which we recommend for a supercharger installation.
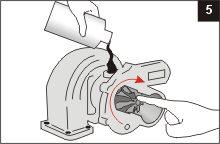
5. After you have connected the smear gear (by turning the rotor), fill in the turbine with clean oil to avoid dry motoring. Pour in the oil through the special inlet.
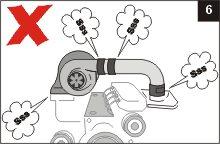
6. Turn off the ignition and then turn the starter to create the proper pressure level in the smear gear. Put the car in neutral and then start the engine (for about 30 seconds). In the meantime check if all the gears are tight and if the whole gear works properly.
After the installation do not change the rotational speed rapidly, wait for a few minutes to ensure that the gear is greased.